Thursday, January 1, 2015

Happy New Year!

Here’s wishing everyone a very happy and successful 2015. I took advantage of an opportunity to shoot up to my parent’s place in Queensland and visited a few places of CP interest that I thought I would share.

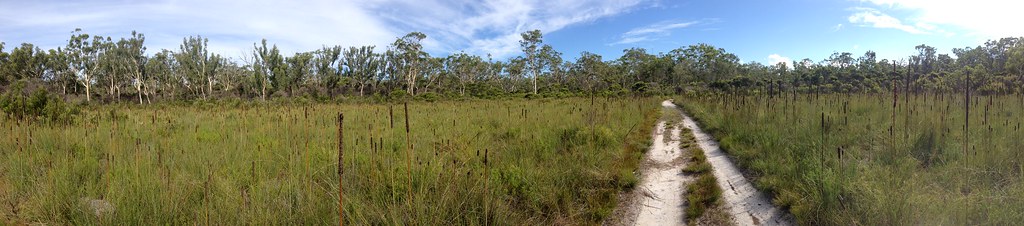
Panorama of heathland, Mooloolah River N.P., Queensland, Australia

The above panorama is of the heathland in the Mooloolah River National Park on Queensland’s Sunshine Coast. This area is where I saw my first wild carnivorous plants: Drosera spathulata var. gympiensis. I will always be grateful to my father for showing them to me, as it opened up my interest in carnivorous plants – they were no longer things found only in books or fragile exotics for sale at our local nursery. They were wild plants growing a few minutes drive from our house.

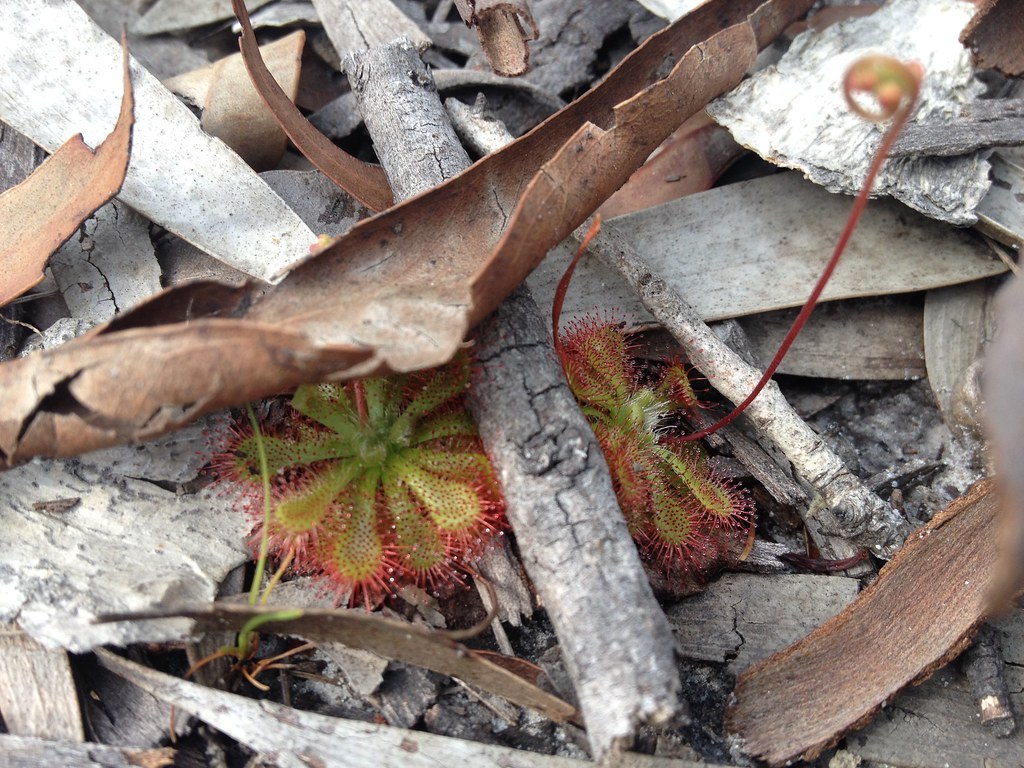
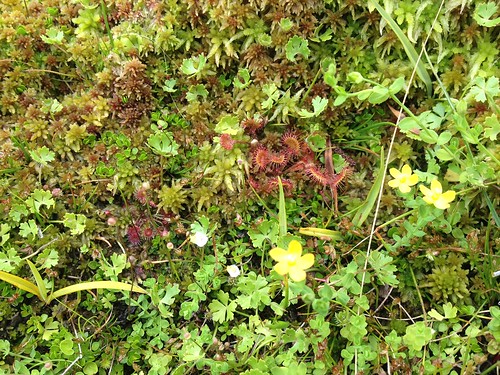
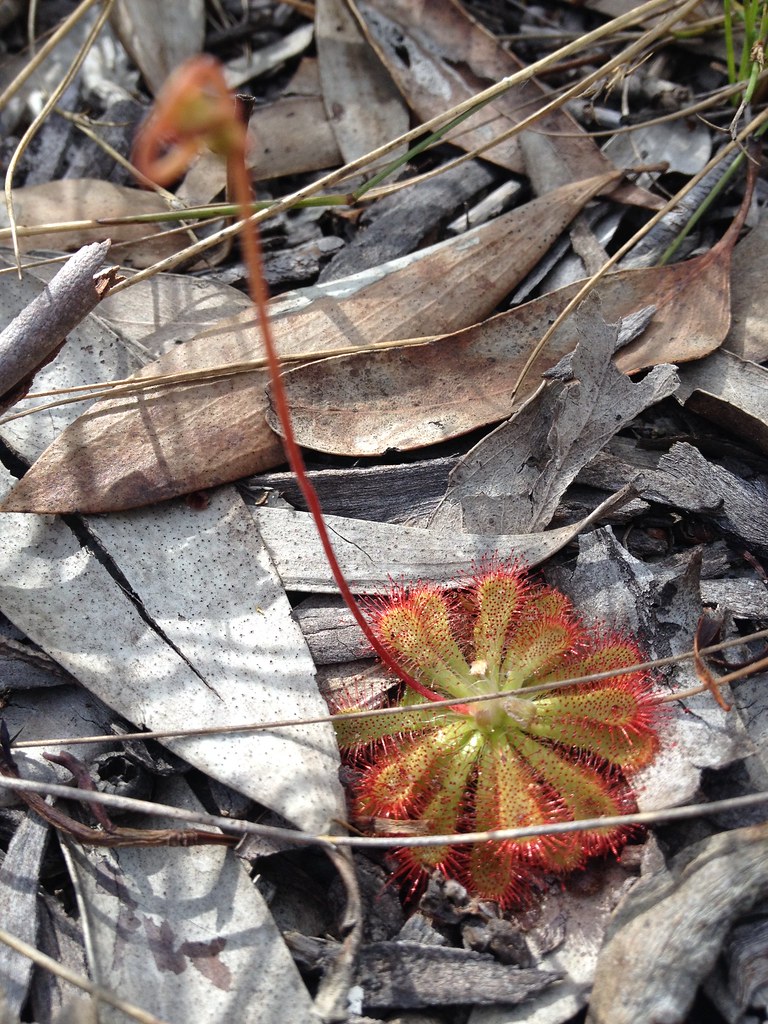
Drosera spathulata var. gympiensis

Drosera spathulata var. gympiensis

Above are a few plants of D. spathulata var. gympiensis from this locality. Individuals can vary tremendously within each population I have seen of this taxon, and here they can range from tiny flowering plants close to the size of D. pygmaea right up to giants over 8 cm across. These are middle of the road plants, perhaps 3-4 cm across, growing in light shade under a canopy of Melaleuca quinquinerva. Plants in full sun become bright burgundy red. Sadly, a lot of other sites I enjoyed visiting as a teenager are now extirpated because of changed hydrology and/or soil chemistry.

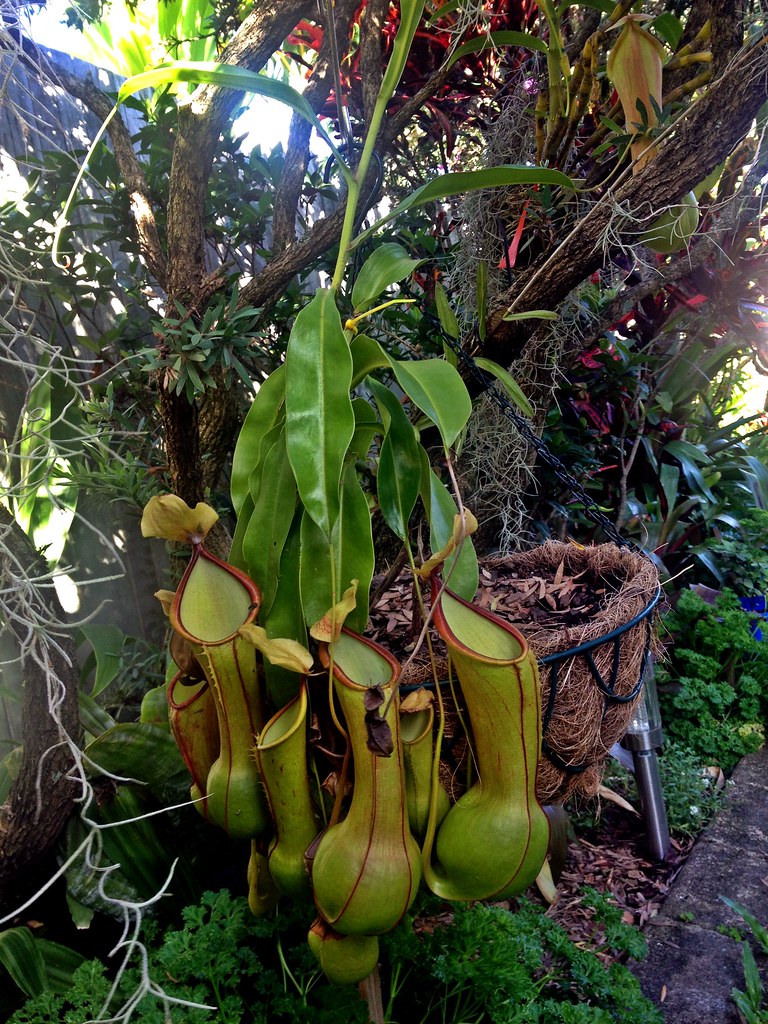
Nepenthes alata var. boschiana

And to close for the night – here is one of the Nepenthes my parents grow outdoors year round in hanging baskets in their Buderim garden. This is Nepenthes alata var. boschiana. Mum fell in love with this clone when we visited Geoff Mansell of Exotica Plants back in 1999, and we have grown it ever since. This one is happily growing up a Callistemon. There are also Nepenthes ventricosa, N. truncata, N. x allardii (= maxima x veitchii) and what is supposed to be N. thorelli in the garden, but none are quite as beautiful as this plant is.

Stay tuned – the photos I promised of my Saracenia gardens are due shortly!

Monday, December 22, 2014

Bog garden update

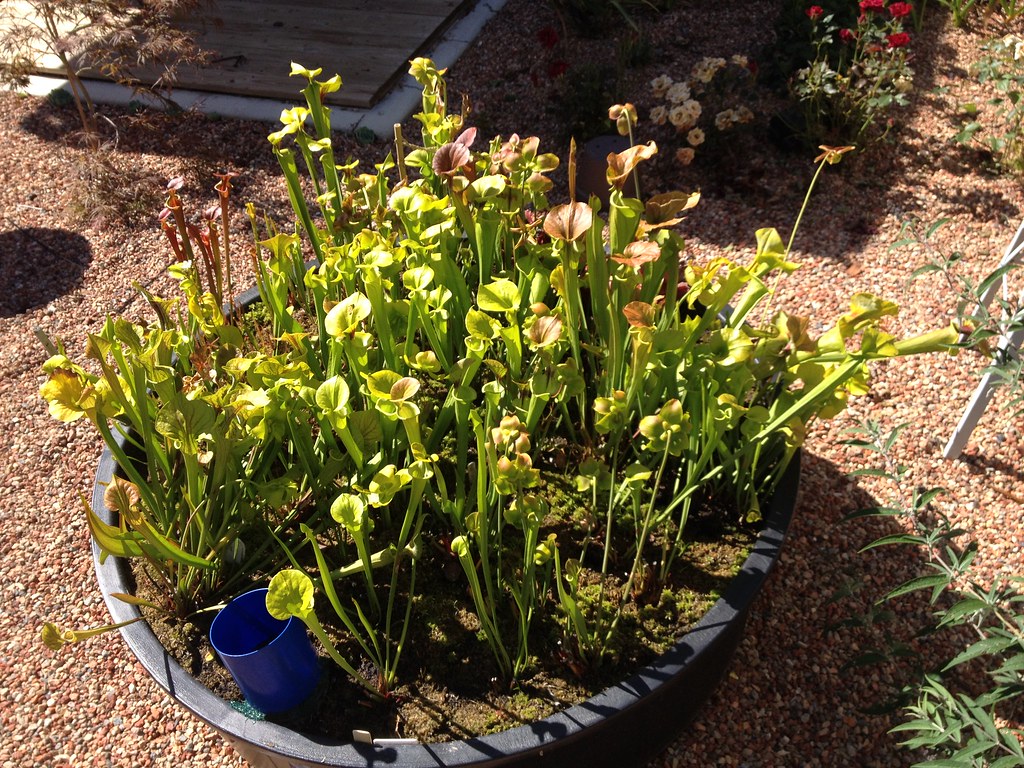
This post has been long overdue and is in no small part due to my recovering broken foot. To be precise, I managed to break one half of the lisfranc joint on my left big toe while chilling at the foot of Thornton’s Peak on a friend’s property. Drosera prolifera is endemic to Thornton’s Peak, so maybe one day I’ll get myself up there to see them. But this post is about the new Sarracenia gardens (I think “bog garden” sounds a bit crass personally). Last time I blogged, they were in the process of being planted. What happened since?

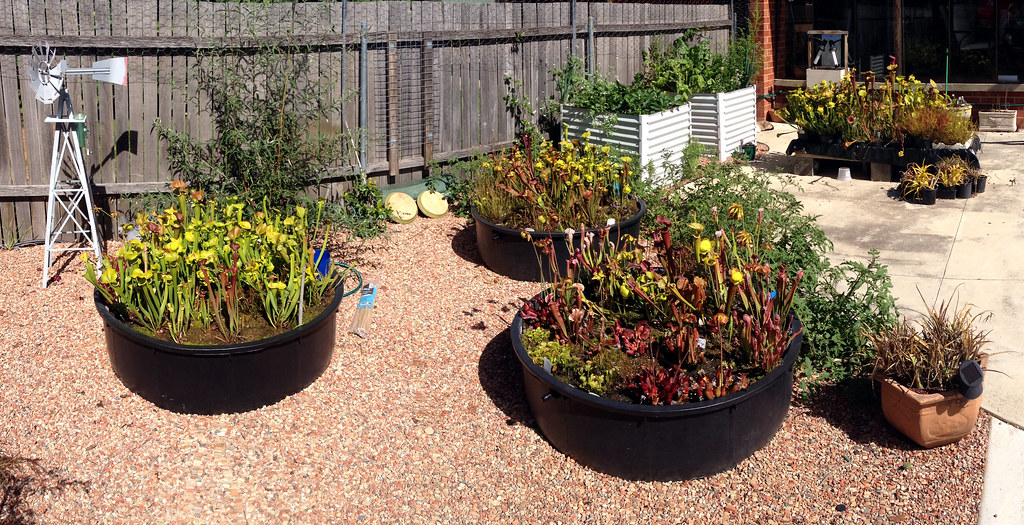
Sarracenia gardens

Sarracenia garden # 1

Pond # 1 is the flava var. atropurpurea / rubricorpora and non-veined flava var. cuprea garden. It also has red VFTs (plus the giant clone, B-52).

Sarracenia garden # 2

Pond # 2 is the flava (excl. atropurpurea & rubricorpora) garden. But a flava var. atropurpurea clone made it in by mistake; I thought I had put it in the appropriate garden and wedged it in here when I found it just as I was finishing up.

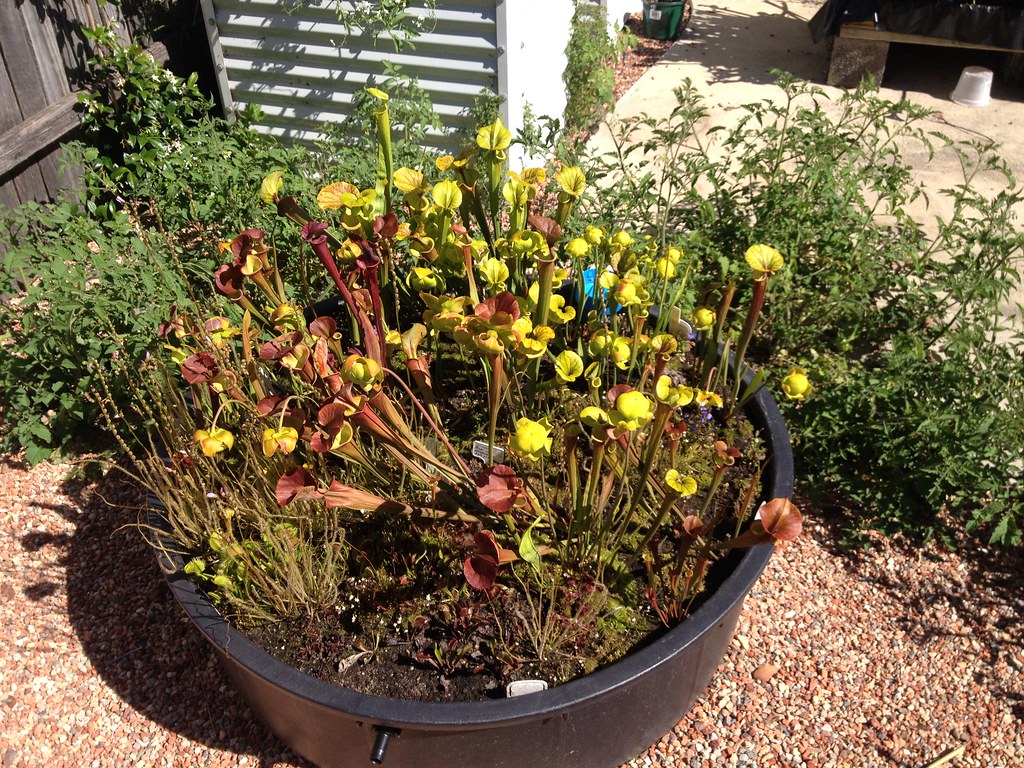
Pond # 3 is the hybrid / purpurea / leucophylla and general VFT garden.

As you can see, the gardens have matured, but it has been a frustrating season so far (another reason for the lack of posts). The plants have done well, but for a while I was beginning to think I had made a mistake because it took them a long time to settle in. A few things contributed to this, some natural and some due to design flaws with the gardens themselves. For one, Sarracenia never look good after being repotted. They always take a season to get over it and settle in. Then there was our windy spring, which resulted in a lot of pitchers being deformed. And then there were design flaws.

The major design flaw was not providing an overflow and a drain. It may seem counterintuitive to have a drain in a bog garden, but I learned the hard way. The pond at far left in the above pictures got in a lot of trouble because, during a hot and windy day, I filled it to overflowing to make sure they plants had enough water. This promptly turned the Sphagnum into soup, and allowed many plants to be uprooted in the wind. In the other ponds, even a day of water sitting on the surface saw a lot of live Sphagnum (which were planted in clumps) grow loads of algae.

Overflow bulkhead prior to installation

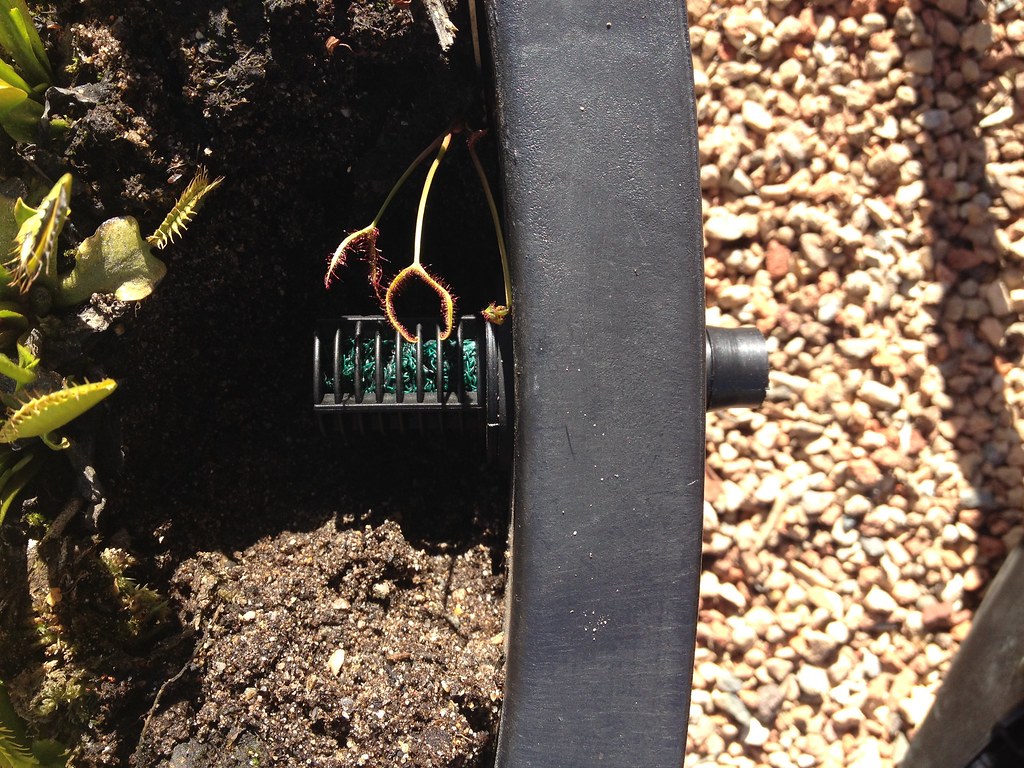
Here is the bulkhead I used to provide an overflow. It creates a seal with two rubber gaskets. I decided to install them about 2 cm below the surface of the garden; this way there is still a high water table without water pooling on the surface.

Overflow installation on my Sarracenia garden

Installing bulkheads onto the gardens is easy. You need a circular, hole-cutting bit (different to a drill bit) and a high-speed drill. Use gentle but firm pressure to ensure a clean cut and remove any burring with a craft knife. Then fit the inner seal onto the bulkhead, insert the threaded end through the hold from the inside to outside, attach the outer gasket, and tighten the holding nut to finger tight only.

Overflow installed on my Sarracenia garden.

Here is what the bulkhead looks like installed. Sure, you could just drill a hole, but if you ever wanted to use the pond to brim full, a bulkhead provides you with the flexibility to do so. Since they have been installed, I merely fill the garden until water starts to come out the overflow. I am very sure I am using a lot less water than I was using the tray method.

There is a lot more to tell about these gardens, but writing about them will have to wait for another night. The plan is to get out and take a stack of macro photos, upload them to Flickr, and then upload them here and write about it. That will take a few days to organise, so bear with me. Until then, good growing.

Friday, December 19, 2014

Getting back into gear–the 2014 Mt Tomah CP sale

Its been a long while since I posted anything, for good reason – a few months ago I broke my foot and this is my first week sans crutches or moon boots. The CP season is in full swing, and now I’m off on holidays, its time to get back into the blog. To get things started off, here are some pics from the Australasian Carnivorous Plant Society’s sale day at Mount Tomah in the Blue Mountains West of Sydney.

View from Mount Tomah botanic gardens.

The drive to Mount Tomah not something I look forward to – the road is rather awkward with the dogleg through Richmond, the Sydney traffic (terrible by Canberra standards) and multiple speed changes in quick succession as you go up the Blue Mountains themselves. Once you get to Bilpin its smooth sailing – all 10 minutes of it! But it is worth it for the plants, the food (I had a magnificent steak and mushroom pot pie for lunch!) and the view. The day I was there had a wet and stormy afternoon.

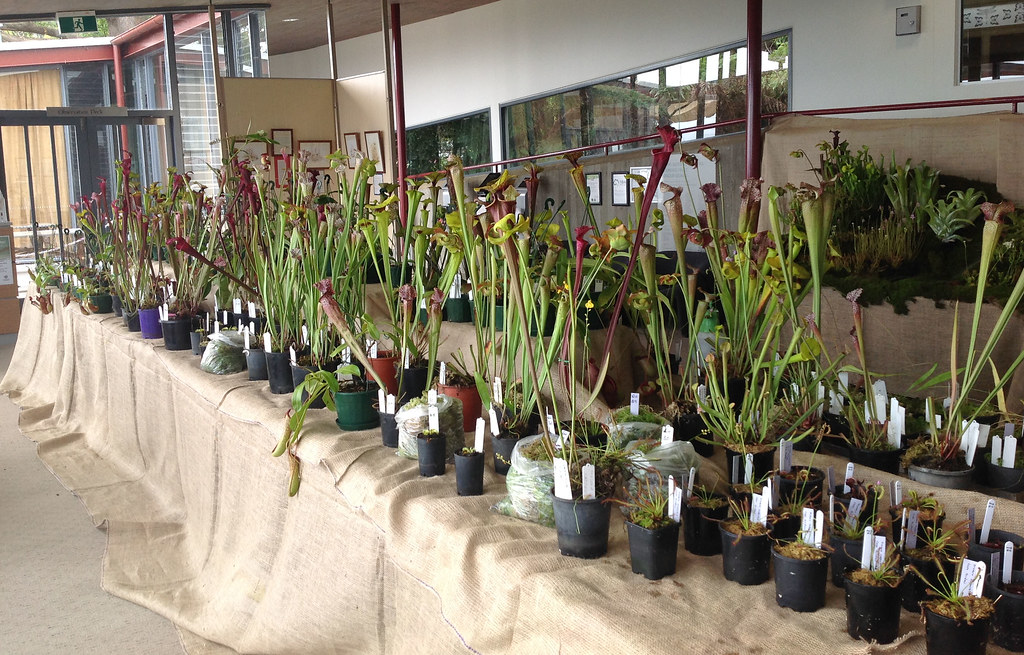
Sarracenia on sale at the Australasian CP Society Sale Day

I didn’t make it to the sale until nearly lunchtime, by which time there were some sizeable holes in the offerings. Lyn Hanna took the above photo of the sale table before people were let loose on it. As you can see, Sarracenia were dominating the scene.

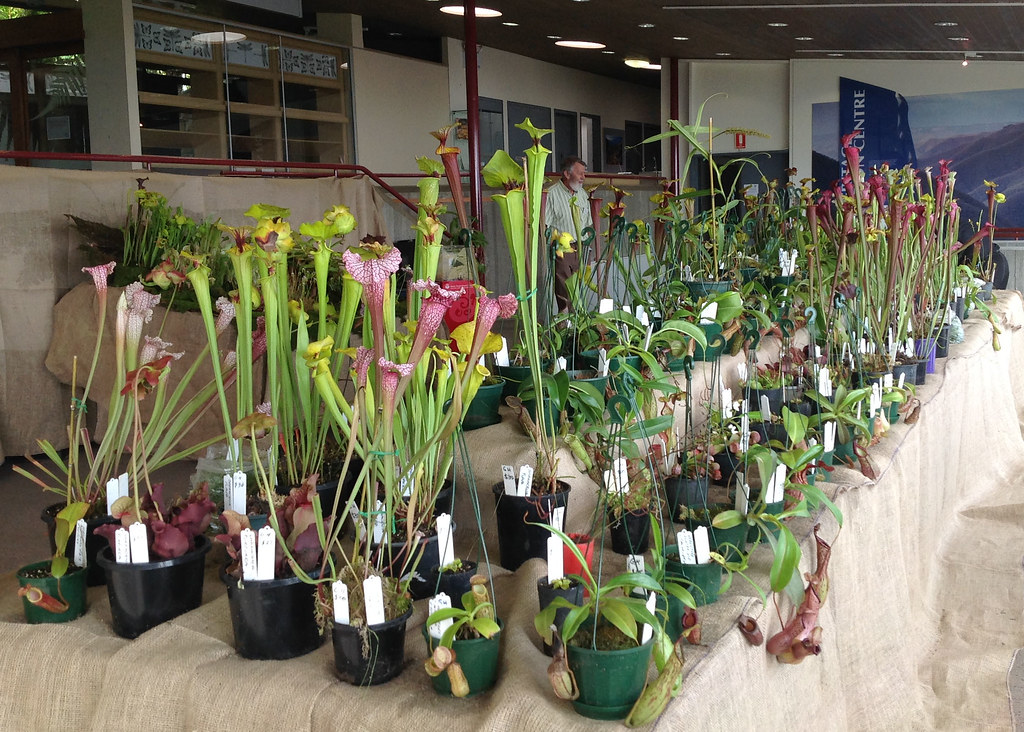
Sarracenia on sale at the Australasian CP Society Sale Day

There were a few Nepenthes though, including some magnificent N. ampullaria that went very quickly. I ended up leaving with a number of S. flava clones (what else!) and the famous pink clone of S. leucophylla that originated from a single seedling germinated by the English family near Wollongong in the late 1970s. By the time I left, over half of these plants (and all bar a handfull of Nepenthes) had sold! These photos were taken by Lyn Hanna, and she and her husband Gordon allowed me to post them here. I always enjoy catching up with both Gordon and Lyn, especially since I hadn’t seen them in several years.

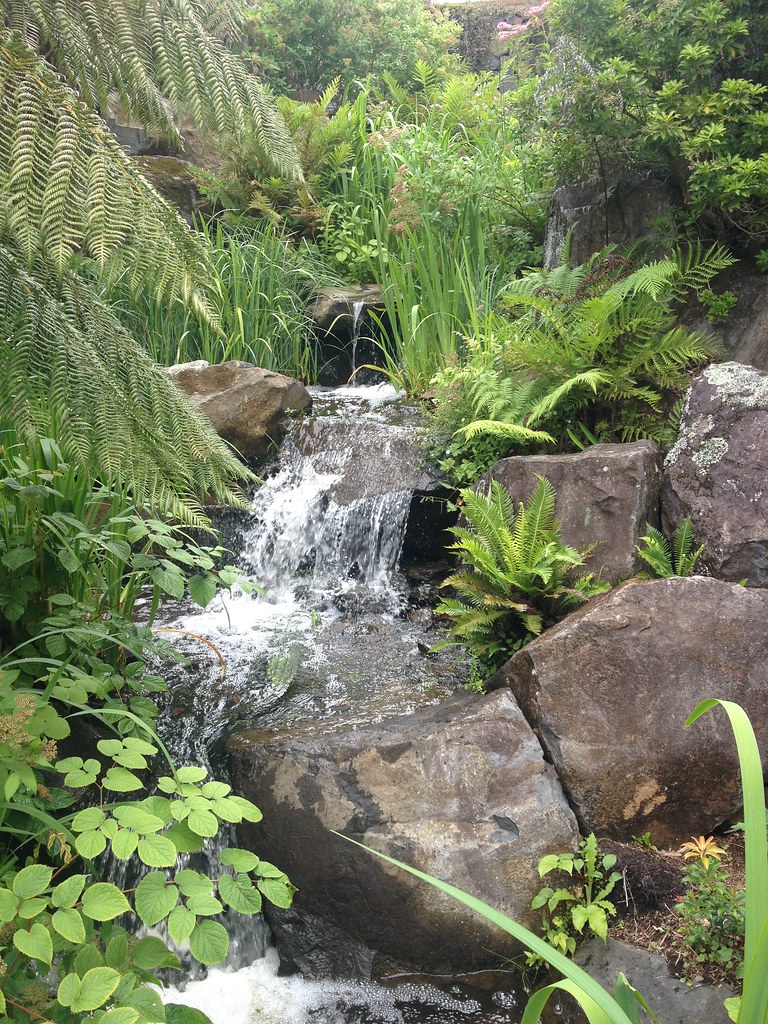
Waterfall at Mt Tomah Botanic Gardens

What I also love about going to the sale days at Mt Tomah is the chance to wander through the alpine gardens. They are beautiful, especially if you are like me and enjoy alpine and cool climate plants and landscapes. The waterfall adds a special ambience to the gardens, and feeds their stunning bog garden.

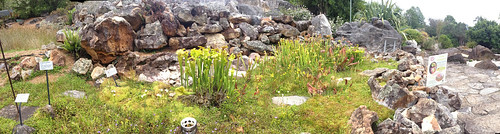
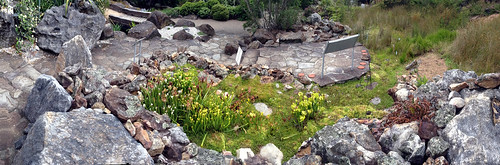
Panorama of the bog garden, Mt Tomah Botanic Gardens

The bog garden at Mt Tomah is beautifully landscaped and a pleasure to spend time at.

Panorama of the Mt Tomah Bog Garden

The substrate is coco peat and live Sphagnum moss, which grows in billowy carpets. Apparently, the gardens are soon to be re-planted.

Here are some close-ups of the bog and its inhabitants:

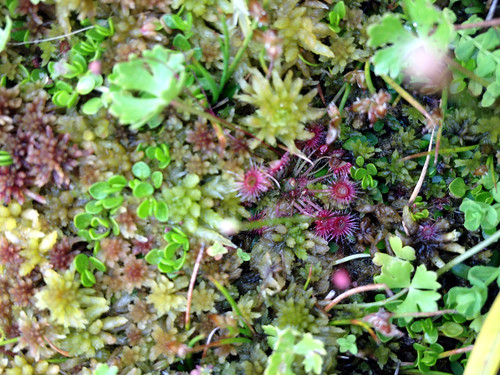
Pygmy drosera

Apparently, when the bog was set up, great care was taken to ensure all soil was removed from the plants to prevent non-indigenous Drosera and Utricularia making it into the garden. Well, some gemmae and seeds must have hung on pretty hard, as Interspersed through the Sphagnum are thousands of tiny pygmy Drosera, which I was once told were a hybrid, plus Utricularia subalata, U. praelonga and the infamous Drosera capensis.

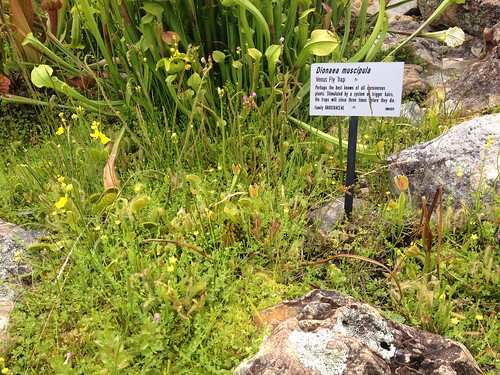
Drosera and Dionaea

Dionaea (flytraps) are always crowd pleasers, except they are apparently very often stolen. Note the yellow Utricularia praelonga flowers and both normal and form alba of Drosera capensis.

Sarracenia flava in the Mt Tomah Bog Garden

This Sarracenia flava var. flava is a plant I have dubbed the NSW clone. I need to re-gain this plant for my collection… read about my bog garden woes which are coming up soon. In the background are some alata x psittacina and giant form S. minor.

Sphagnum cristatum and inhabitants

Drosera rotundifolia also grows prolifically in the garden. I suspect a dense covering of low, spreading herbs helps keep the Sphagnum protected during hot weather. The herb with heavily divided leaves are a type of native Geranium. We had a rather large and lanky species in the south of Canberra that became a garden weed.

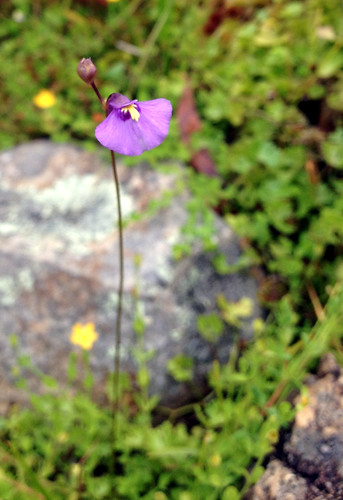
Utricularia dichotoma

Here is a flower of our native Utrricularia dichotoma. My plants have done very well since going into the new bog gardens.

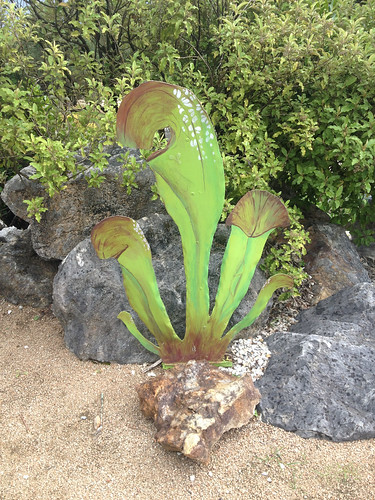
Ply Sarracenia figurine

To raise awareness of the CP sale, there were some figurines of Sarracenia placed through the garden, including this S. minor look-a-like.

Overhead pano of the Mount Tomah botanic gardens bog

And to close, an overhead view of the bog garden.

And speaking of bog gardens, I have been patiently waiting to provide an update of my bog gardens. Stay tuned, as I have some suggestions on how to (and how not to) build bog gardens for carnivorous plants.

Until then, happy growing!

Sunday, May 4, 2014

How to make a bog garden, part 3. The planting.

So, here was where we were up to in the last post – ponds filled with peat and sand.

Today was the big day – starting the planting.

Before you plant, it is a very good idea to do a dry run with potted plants to sort out the arrangement. This may be a bit of extra effort, but it makes sense in the long run as digging up a bog garden is a lot of work (been there done that – twice!). So take the time and do it right!

Here is the bog for the non-red Sarracenia flava laid out in preparation for planting. This may look random, but it has been carefully arranged believe me! I will be putting maybe three or four divisions of several growing points each plant in the bog, not all the plants in each pot!

Here is a suggested planting layout for Sarracenia bog gardens. In the southern hemisphere, the sun is always to the north, so the tallest plants are planted on the southern end of the bog. This will stop them shading the shorter plants out. This is reversed in the northern hemisphere, where the sun is always to the south, meaning the tallest plants go to the north. In the photo of the laid out bog, the tallest plant I have – a S. flava var. flava I call “Helmut’s Giant” (after Australian Pinguicula expert Helmut Kibelis) – is on the southern extreme, with S. oreophila and some of the shorter S. flava at the front.

By this stage, the collection trays have some serious holes in them!

The first plants that went into the bog were the shortest – VFTs and some sundews, namely Drosera filiformis spp. filiformis, D. binata T-form, D. binata var. multifida (Blue Mountains clone), D. pulchella, D. pygmaea, D. x tokaiensis, D. nidiformis and of course, D. capensis. Here is the layout of the VFTs, with B52 at left and assorted red clones.

And here they are planted up. These plants are fairly straightforwards to plant, as their roots are chunky but thread like. A tent peg to poke holes in the bog was all that was needed. The method I use needs a plastic pipe or some other rigid pole that can be poked into the bog and will remain upright on its own.

Sarracenia, on the other hand, have very extensive root systems, and grow from a rhizome that branches across the soil surface. They need to be carefully planted and arranged.

Poke the pole into the bog where you want to plant your Sarracenia. Remember, they will be in the bog for longer than they would be in pots for, so allow for growth forwards for maybe four seasons when you position your pole (as a rough guide, my rhizomes grow maybe 20 mm in a season). Then dig out a channel or trench about 10cm wide in an arc around the pole, facing the direction of the sun (north in the southern hemisphere, and vice versa). It should extend all the way down to the gravel layer. Shape the peat and sand into a mound around the pole with nearly vertical sides, as shown.

Place no more than three or four divisions so the end of the rhizome buts against the pole, with their roots splayed out across the mound. Point each division so that its growth points will not converge on other plants. The mound should support the rhizome base and the roots, keeping the plants more or less in place. Keeping each rhizome level with the soil surface, scrape the soil back into the trench, gently burying the roots and packing soil under the rhizome. Most Sarracenia will bury themselves to varying degrees. I always keep the rhizome on the surface, but use the following method to re-establish the growth point correctly:

The pigmented areas of the growth points have been exposed to light, whereas the white areas have not. To re-plant your rhizome at the depth it was growing at, bury the growing point so that the white areas are underground, and the pigmented areas are above ground. Regardless of how you position the growth point, try and keep as much of the rhizome exposed as possible, as it promotes division and allows you to check on rhizome health without disturbing the plant.

The above techniques also work for pots. Fill the pot by a third, position the pipe maybe 1-2 inches behind the centre of the pot and build your mound out from the back of the pot to the pipe and building it to the top of the pot. Then position your rhizomes and fill the pot as above. 3-4 rhizomes per pot (maximum 8!) make a fine display, and the plants really do like being grown in clumps.

Here is where I had got to using the above methods by sunset – four clones of Sarracenia flava var. atropurpurea (FRT 1-1, FRT 1-1 x flava var. rubricorpora “Gotcha! Giant”, and two seedlings ex seed, Blackwater State Forest, Florida), two of S. flava var. rubricorpora (Gotcha! Giant, Reytter’s Clone) and one S. flava var. cuprea (Helmut’s rosy red), plus the VFTs and sundews.
Saturday, May 3, 2014

Making the bog garden–part 2

So here is where we were up to with the bog garden construction in the last post. The pond shells were levelled on gravel, fitted with ag pipe fillers and a level indicator, and half filled with washed, blue metal.

Yesterday I got to work on filling the bogs up with peat and sand mix. I always use a ratio of 1:1 peat: sand. Do not use perlite in bog gardens, as my experience with pots is that the perlite eventually floats up through the peat and then blows everywhere. Washed river sand that has been checked for presence of alkalines using an acid test (sprinkle sand into a weak acid like vinegar) works the best. I used TEEM Canadian sphagnum peat moss, which is a longtime staple of CP growers worldwide. It is sold in white, plastic wrapped bales in compressed form, which makes it a little painful to work with. Here is what it looks like as it comes out of the bale:

These chunks need to be broken down into a fine tilth. I break hand-sized chunks off and roll them between my hands, which soon reduces them to the required consistency. The peat also needs to be re-wetted before it is safe to plant into.

At first, I started off pre-mixing the peat with sand in a separate container, but soon realised it was much easier to mix in the bog. Using a hose, I added water until it was several inches deep over the gravel, then dumped equal parts peat and sand into the bog garden and mixed thoroughly by hand. You can use a rake to help smooth it out, but I don’t suggest doing this in a pond with a plastic film liner. Make sure you get the ag pipe filler tube vertical so it is easy to see the fill indicator. Until the peat has saturated and settled, you won’t be able to see the filler for a layer of floaties.

<photo coming>

Once you have filled the bogs to the top, water thoroughly with a gentle spray or rose nozzle to saturate the peat. It will take a few days for the peat to absorb its full capacity of water, so fill it to within a inch of the top of the bog. This may sound like excess (especially if it is winter), but dehydrated peat will absorb a lot of water and require successive top-ups. The amount of free water in the bog will fluctuate wildly as a result. You can plant the bog up at this stage, but the water variations are not optimal for your plants. If you can, wait until you have got the water level stable.

And voila, here are the filled bogs.

Next step – designing the planting layout and planting the bog! As it is raining here Saturday, Sunday looks like it will be BG-Day!