Monday, December 22, 2014

Bog garden update

This post has been long overdue and is in no small part due to my recovering broken foot. To be precise, I managed to break one half of the lisfranc joint on my left big toe while chilling at the foot of Thornton’s Peak on a friend’s property. Drosera prolifera is endemic to Thornton’s Peak, so maybe one day I’ll get myself up there to see them. But this post is about the new Sarracenia gardens (I think “bog garden” sounds a bit crass personally). Last time I blogged, they were in the process of being planted. What happened since?

Sarracenia gardens

Sarracenia garden # 1

Pond # 1 is the flava var. atropurpurea / rubricorpora and non-veined flava var. cuprea garden. It also has red VFTs (plus the giant clone, B-52).

Sarracenia garden # 2

Pond # 2 is the flava (excl. atropurpurea & rubricorpora) garden. But a flava var. atropurpurea clone made it in by mistake; I thought I had put it in the appropriate garden and wedged it in here when I found it just as I was finishing up.

Pond # 3 is the hybrid / purpurea / leucophylla and general VFT garden.

As you can see, the gardens have matured, but it has been a frustrating season so far (another reason for the lack of posts). The plants have done well, but for a while I was beginning to think I had made a mistake because it took them a long time to settle in. A few things contributed to this, some natural and some due to design flaws with the gardens themselves. For one, Sarracenia never look good after being repotted. They always take a season to get over it and settle in. Then there was our windy spring, which resulted in a lot of pitchers being deformed. And then there were design flaws.

The major design flaw was not providing an overflow and a drain. It may seem counterintuitive to have a drain in a bog garden, but I learned the hard way. The pond at far left in the above pictures got in a lot of trouble because, during a hot and windy day, I filled it to overflowing to make sure they plants had enough water. This promptly turned the Sphagnum into soup, and allowed many plants to be uprooted in the wind. In the other ponds, even a day of water sitting on the surface saw a lot of live Sphagnum (which were planted in clumps) grow loads of algae.

Overflow bulkhead prior to installation

Here is the bulkhead I used to provide an overflow. It creates a seal with two rubber gaskets. I decided to install them about 2 cm below the surface of the garden; this way there is still a high water table without water pooling on the surface.

Overflow installation on my Sarracenia garden

Installing bulkheads onto the gardens is easy. You need a circular, hole-cutting bit (different to a drill bit) and a high-speed drill. Use gentle but firm pressure to ensure a clean cut and remove any burring with a craft knife. Then fit the inner seal onto the bulkhead, insert the threaded end through the hold from the inside to outside, attach the outer gasket, and tighten the holding nut to finger tight only.

Overflow installed on my Sarracenia garden.

Here is what the bulkhead looks like installed. Sure, you could just drill a hole, but if you ever wanted to use the pond to brim full, a bulkhead provides you with the flexibility to do so. Since they have been installed, I merely fill the garden until water starts to come out the overflow. I am very sure I am using a lot less water than I was using the tray method.

There is a lot more to tell about these gardens, but writing about them will have to wait for another night. The plan is to get out and take a stack of macro photos, upload them to Flickr, and then upload them here and write about it. That will take a few days to organise, so bear with me. Until then, good growing.

Friday, December 19, 2014

Getting back into gear–the 2014 Mt Tomah CP sale

Its been a long while since I posted anything, for good reason – a few months ago I broke my foot and this is my first week sans crutches or moon boots. The CP season is in full swing, and now I’m off on holidays, its time to get back into the blog. To get things started off, here are some pics from the Australasian Carnivorous Plant Society’s sale day at Mount Tomah in the Blue Mountains West of Sydney.

View from Mount Tomah botanic gardens.

The drive to Mount Tomah not something I look forward to – the road is rather awkward with the dogleg through Richmond, the Sydney traffic (terrible by Canberra standards) and multiple speed changes in quick succession as you go up the Blue Mountains themselves. Once you get to Bilpin its smooth sailing – all 10 minutes of it! But it is worth it for the plants, the food (I had a magnificent steak and mushroom pot pie for lunch!) and the view. The day I was there had a wet and stormy afternoon.

Sarracenia on sale at the Australasian CP Society Sale Day

I didn’t make it to the sale until nearly lunchtime, by which time there were some sizeable holes in the offerings. Lyn Hanna took the above photo of the sale table before people were let loose on it. As you can see, Sarracenia were dominating the scene.

Sarracenia on sale at the Australasian CP Society Sale Day

There were a few Nepenthes though, including some magnificent N. ampullaria that went very quickly. I ended up leaving with a number of S. flava clones (what else!) and the famous pink clone of S. leucophylla that originated from a single seedling germinated by the English family near Wollongong in the late 1970s. By the time I left, over half of these plants (and all bar a handfull of Nepenthes) had sold! These photos were taken by Lyn Hanna, and she and her husband Gordon allowed me to post them here. I always enjoy catching up with both Gordon and Lyn, especially since I hadn’t seen them in several years.

Waterfall at Mt Tomah Botanic Gardens

What I also love about going to the sale days at Mt Tomah is the chance to wander through the alpine gardens. They are beautiful, especially if you are like me and enjoy alpine and cool climate plants and landscapes. The waterfall adds a special ambience to the gardens, and feeds their stunning bog garden.

Panorama of the bog garden, Mt Tomah Botanic Gardens

The bog garden at Mt Tomah is beautifully landscaped and a pleasure to spend time at.

Panorama of the Mt Tomah Bog Garden

The substrate is coco peat and live Sphagnum moss, which grows in billowy carpets. Apparently, the gardens are soon to be re-planted.

Here are some close-ups of the bog and its inhabitants:

Pygmy drosera

Apparently, when the bog was set up, great care was taken to ensure all soil was removed from the plants to prevent non-indigenous Drosera and Utricularia making it into the garden. Well, some gemmae and seeds must have hung on pretty hard, as Interspersed through the Sphagnum are thousands of tiny pygmy Drosera, which I was once told were a hybrid, plus Utricularia subalata, U. praelonga and the infamous Drosera capensis.

Drosera and Dionaea

Dionaea (flytraps) are always crowd pleasers, except they are apparently very often stolen. Note the yellow Utricularia praelonga flowers and both normal and form alba of Drosera capensis.

Sarracenia flava in the Mt Tomah Bog Garden

This Sarracenia flava var. flava is a plant I have dubbed the NSW clone. I need to re-gain this plant for my collection… read about my bog garden woes which are coming up soon. In the background are some alata x psittacina and giant form S. minor.

Sphagnum cristatum and inhabitants

Drosera rotundifolia also grows prolifically in the garden. I suspect a dense covering of low, spreading herbs helps keep the Sphagnum protected during hot weather. The herb with heavily divided leaves are a type of native Geranium. We had a rather large and lanky species in the south of Canberra that became a garden weed.

Utricularia dichotoma

Here is a flower of our native Utrricularia dichotoma. My plants have done very well since going into the new bog gardens.

Ply Sarracenia figurine

To raise awareness of the CP sale, there were some figurines of Sarracenia placed through the garden, including this S. minor look-a-like.

Overhead pano of the Mount Tomah botanic gardens bog

And to close, an overhead view of the bog garden.

And speaking of bog gardens, I have been patiently waiting to provide an update of my bog gardens. Stay tuned, as I have some suggestions on how to (and how not to) build bog gardens for carnivorous plants.

Until then, happy growing!

Sunday, May 4, 2014

How to make a bog garden, part 3. The planting.

So, here was where we were up to in the last post – ponds filled with peat and sand.

Today was the big day – starting the planting.

Before you plant, it is a very good idea to do a dry run with potted plants to sort out the arrangement. This may be a bit of extra effort, but it makes sense in the long run as digging up a bog garden is a lot of work (been there done that – twice!). So take the time and do it right!

Here is the bog for the non-red Sarracenia flava laid out in preparation for planting. This may look random, but it has been carefully arranged believe me! I will be putting maybe three or four divisions of several growing points each plant in the bog, not all the plants in each pot!

Here is a suggested planting layout for Sarracenia bog gardens. In the southern hemisphere, the sun is always to the north, so the tallest plants are planted on the southern end of the bog. This will stop them shading the shorter plants out. This is reversed in the northern hemisphere, where the sun is always to the south, meaning the tallest plants go to the north. In the photo of the laid out bog, the tallest plant I have – a S. flava var. flava I call “Helmut’s Giant” (after Australian Pinguicula expert Helmut Kibelis) – is on the southern extreme, with S. oreophila and some of the shorter S. flava at the front.

By this stage, the collection trays have some serious holes in them!

The first plants that went into the bog were the shortest – VFTs and some sundews, namely Drosera filiformis spp. filiformis, D. binata T-form, D. binata var. multifida (Blue Mountains clone), D. pulchella, D. pygmaea, D. x tokaiensis, D. nidiformis and of course, D. capensis. Here is the layout of the VFTs, with B52 at left and assorted red clones.

And here they are planted up. These plants are fairly straightforwards to plant, as their roots are chunky but thread like. A tent peg to poke holes in the bog was all that was needed. The method I use needs a plastic pipe or some other rigid pole that can be poked into the bog and will remain upright on its own.

Sarracenia, on the other hand, have very extensive root systems, and grow from a rhizome that branches across the soil surface. They need to be carefully planted and arranged.

Poke the pole into the bog where you want to plant your Sarracenia. Remember, they will be in the bog for longer than they would be in pots for, so allow for growth forwards for maybe four seasons when you position your pole (as a rough guide, my rhizomes grow maybe 20 mm in a season). Then dig out a channel or trench about 10cm wide in an arc around the pole, facing the direction of the sun (north in the southern hemisphere, and vice versa). It should extend all the way down to the gravel layer. Shape the peat and sand into a mound around the pole with nearly vertical sides, as shown.

Place no more than three or four divisions so the end of the rhizome buts against the pole, with their roots splayed out across the mound. Point each division so that its growth points will not converge on other plants. The mound should support the rhizome base and the roots, keeping the plants more or less in place. Keeping each rhizome level with the soil surface, scrape the soil back into the trench, gently burying the roots and packing soil under the rhizome. Most Sarracenia will bury themselves to varying degrees. I always keep the rhizome on the surface, but use the following method to re-establish the growth point correctly:

The pigmented areas of the growth points have been exposed to light, whereas the white areas have not. To re-plant your rhizome at the depth it was growing at, bury the growing point so that the white areas are underground, and the pigmented areas are above ground. Regardless of how you position the growth point, try and keep as much of the rhizome exposed as possible, as it promotes division and allows you to check on rhizome health without disturbing the plant.

The above techniques also work for pots. Fill the pot by a third, position the pipe maybe 1-2 inches behind the centre of the pot and build your mound out from the back of the pot to the pipe and building it to the top of the pot. Then position your rhizomes and fill the pot as above. 3-4 rhizomes per pot (maximum 8!) make a fine display, and the plants really do like being grown in clumps.

Here is where I had got to using the above methods by sunset – four clones of Sarracenia flava var. atropurpurea (FRT 1-1, FRT 1-1 x flava var. rubricorpora “Gotcha! Giant”, and two seedlings ex seed, Blackwater State Forest, Florida), two of S. flava var. rubricorpora (Gotcha! Giant, Reytter’s Clone) and one S. flava var. cuprea (Helmut’s rosy red), plus the VFTs and sundews.

Saturday, May 3, 2014

Making the bog garden–part 2

So here is where we were up to with the bog garden construction in the last post. The pond shells were levelled on gravel, fitted with ag pipe fillers and a level indicator, and half filled with washed, blue metal.

Yesterday I got to work on filling the bogs up with peat and sand mix. I always use a ratio of 1:1 peat: sand. Do not use perlite in bog gardens, as my experience with pots is that the perlite eventually floats up through the peat and then blows everywhere. Washed river sand that has been checked for presence of alkalines using an acid test (sprinkle sand into a weak acid like vinegar) works the best. I used TEEM Canadian sphagnum peat moss, which is a longtime staple of CP growers worldwide. It is sold in white, plastic wrapped bales in compressed form, which makes it a little painful to work with. Here is what it looks like as it comes out of the bale:

These chunks need to be broken down into a fine tilth. I break hand-sized chunks off and roll them between my hands, which soon reduces them to the required consistency. The peat also needs to be re-wetted before it is safe to plant into.

At first, I started off pre-mixing the peat with sand in a separate container, but soon realised it was much easier to mix in the bog. Using a hose, I added water until it was several inches deep over the gravel, then dumped equal parts peat and sand into the bog garden and mixed thoroughly by hand. You can use a rake to help smooth it out, but I don’t suggest doing this in a pond with a plastic film liner. Make sure you get the ag pipe filler tube vertical so it is easy to see the fill indicator. Until the peat has saturated and settled, you won’t be able to see the filler for a layer of floaties.

<photo coming>

Once you have filled the bogs to the top, water thoroughly with a gentle spray or rose nozzle to saturate the peat. It will take a few days for the peat to absorb its full capacity of water, so fill it to within a inch of the top of the bog. This may sound like excess (especially if it is winter), but dehydrated peat will absorb a lot of water and require successive top-ups. The amount of free water in the bog will fluctuate wildly as a result. You can plant the bog up at this stage, but the water variations are not optimal for your plants. If you can, wait until you have got the water level stable.

And voila, here are the filled bogs.

Next step – designing the planting layout and planting the bog! As it is raining here Saturday, Sunday looks like it will be BG-Day!

Monday, April 28, 2014

Converting the collection to a bog garden, or How to make a Bog Garden for Sarracenia (Part 1)

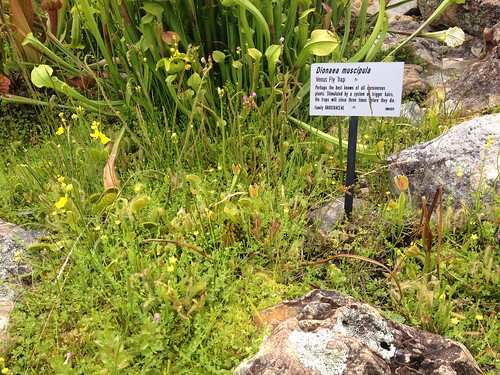
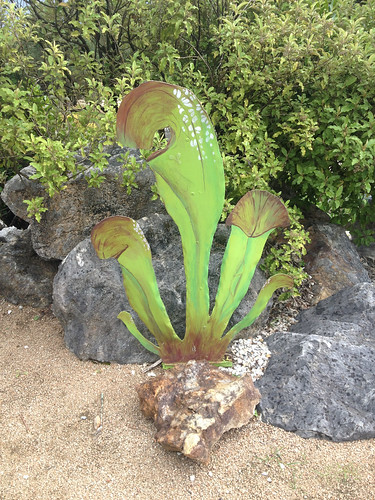
That’s right! I am turning my collection into a bog garden! Please note this post is a work in progress, so for longevity, I will be adding a lot more photos as the build progresses.

*******************************************************************************************

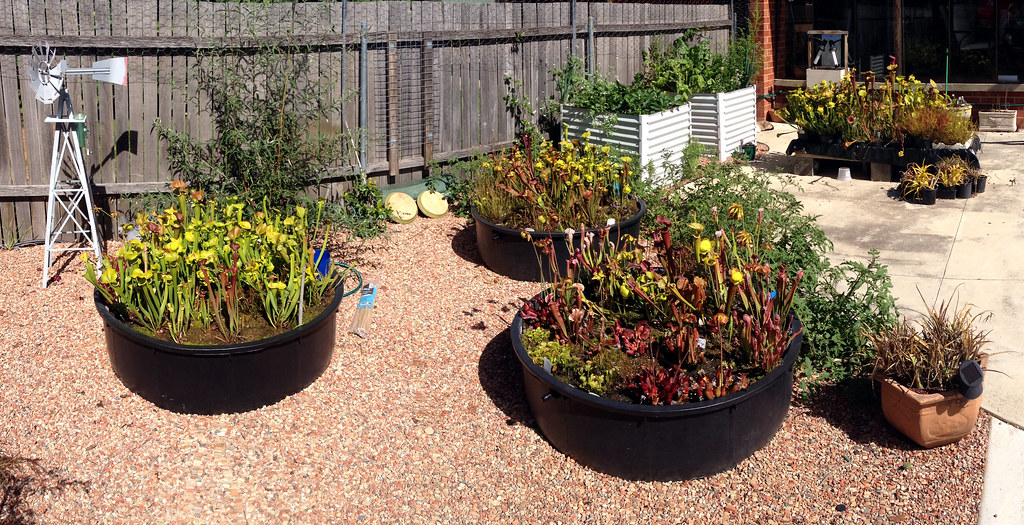
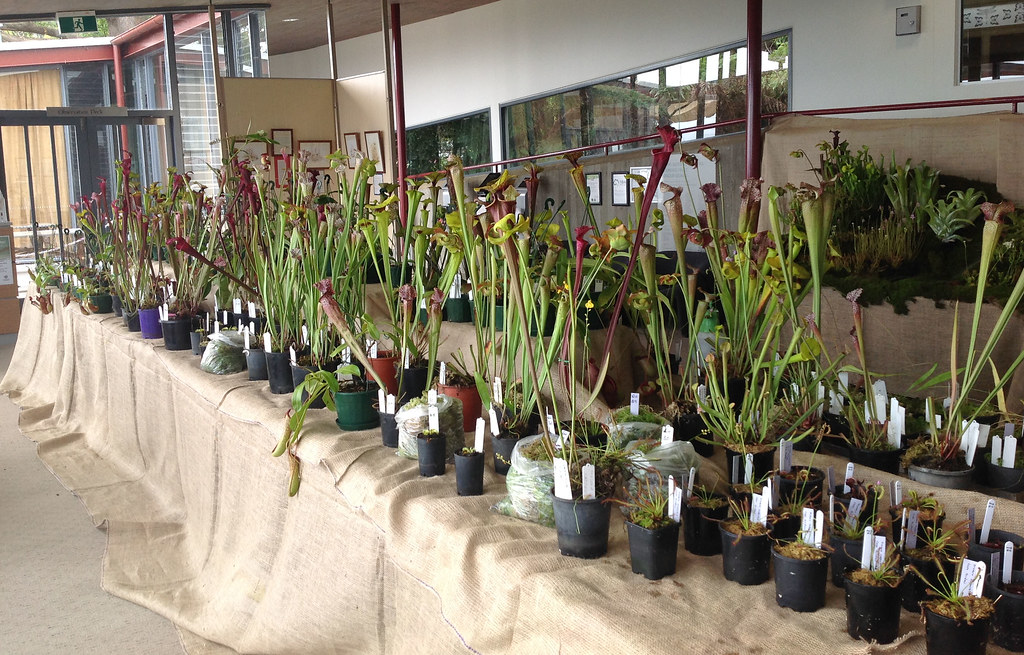
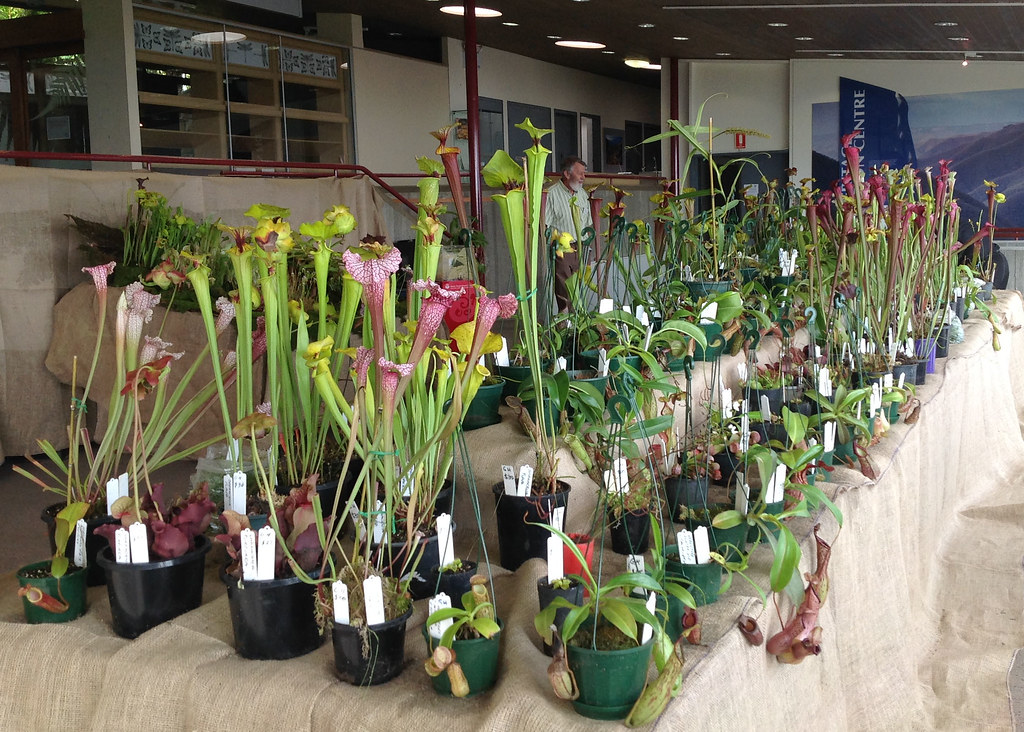
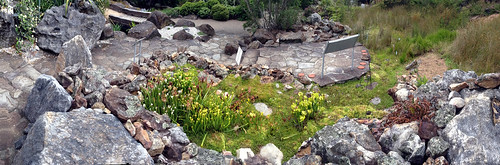
So, here was where we were at the other week. I had brought some ponds and was thinking of setting up my potted Sarracenia collection in them as a hybrid potted-bog garden-pond-with-fish arrangement.

Last weekend, I set about measuring up the new ponds for how many pots they could take, how to arrange the pots for optimum light exposure, and looking at what fish would be best for mosquito control. A problem kept on coming up – in order to maintain a half decent collection of plants, the distance between the pots would be too small to allow me to keep fish in there. The downside – the ponds would provide a perfect breeding spot for mosquitoes. In the end, it was obvious that doing away with pots completely and using the ponds to make a bog garden was the solution.

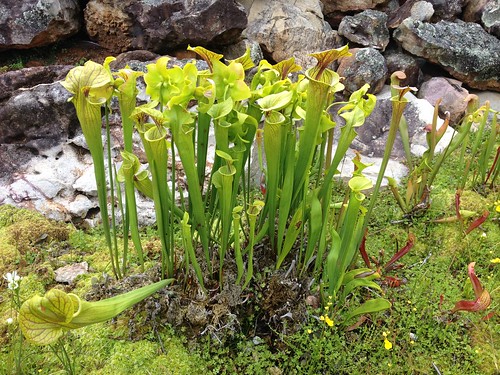
I used to grow Sarracenia in bog gardens in Queensland and, despite breaking three key rules at different times (eg. concrete pond, unwittingly using sedge peat – which is alkaline, and too shady a spot) the plants thrived and were a feature of the garden that people always marvelled at. There are numerous examples of successful bog gardens on the web, with Carl Mazur’s blog my favourite (and an ongoing source of inspiration).

So, here are my experiences in setting up a bog garden, and photos of how it actually looks.

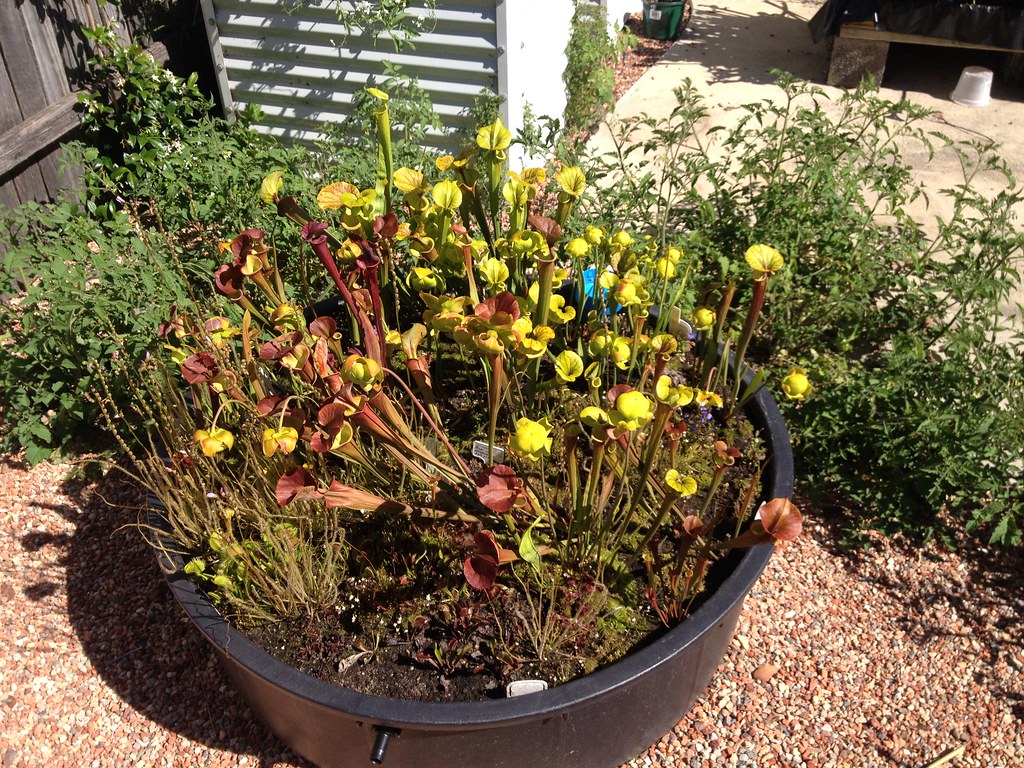
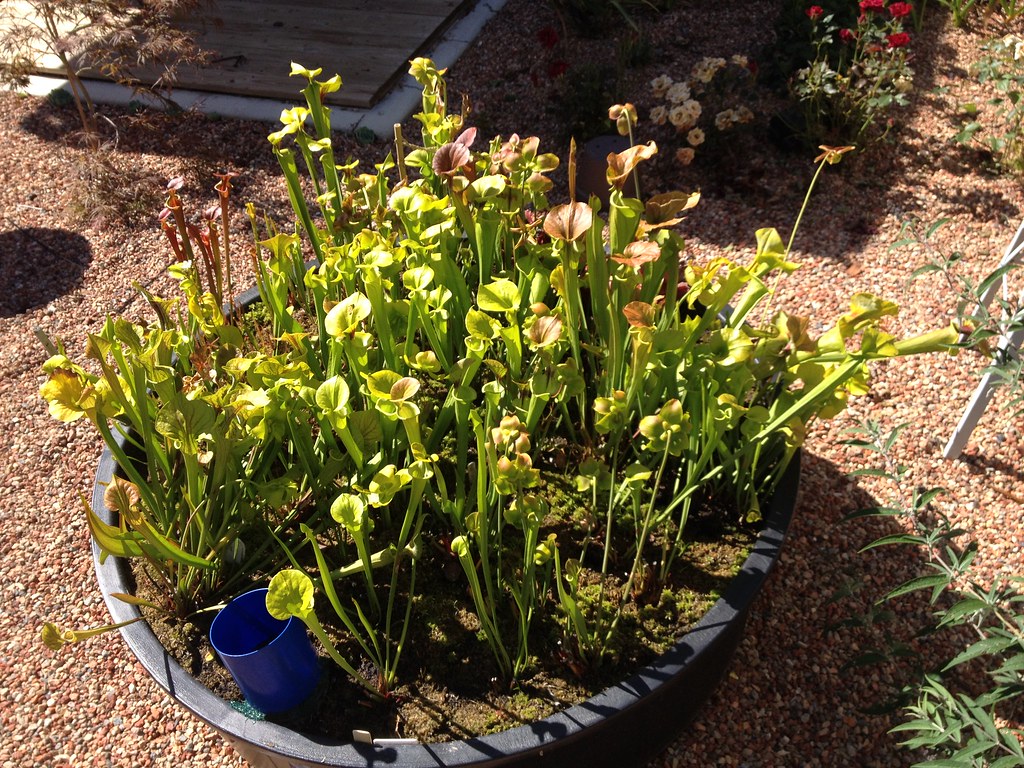
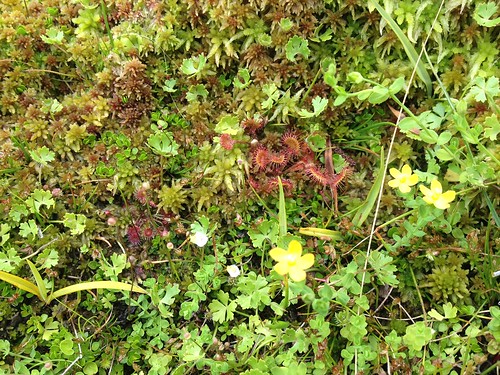
Container choice is important. I used reinforced plastic ponds 110 cm wide (44” or 3.66 feet) and 34 cm deep (nearly 14”), but you can also use pond liner (excellent unless you have trees with invasive roots or grasses like couch). There are lots of tips for laying pond liner or installing ponds into the ground on the web, so I won’t repeat that side of things here. But make sure you keep the size manageable – try to keep the width less than twice your arm length for ease of access. I would suggest allowing no more than three plants deep, with a generous allowance between each plant to allow light penetration. As you can see in the above photo, three deep Sarracenia block out a lot of light! The bog may look open at first, but it will grow in, especially if you add plants like Drosera and VFTs (which you should – they enhance the appearance greatly). Sarracenia, if planted well, will form clumps that will get much bigger than you would expect – if you are patient of course! You will eventually have to divide and thin out the clumps, but the longer between disturbances the better you plants will be for it. Of course, you will have to be more diligent in checking for rhizome problems too.

As they say in real estate, position is everything. Bog gardens are hard to move once set up (done this twice in my life with family help – not fun!), so make sure you position it so it will get full sun from early Spring onwards, at least 6-8 hours per day. I have got away with a lot less (my last bog was relegated to a relatively poor position underneath a huge Acacia tree and got about 4 hours!), but you will notice the difference if you give it the extra light. Carnivores forgo photosynthesis efficiency through using their leaves as traps, so they need as much light as they can get.

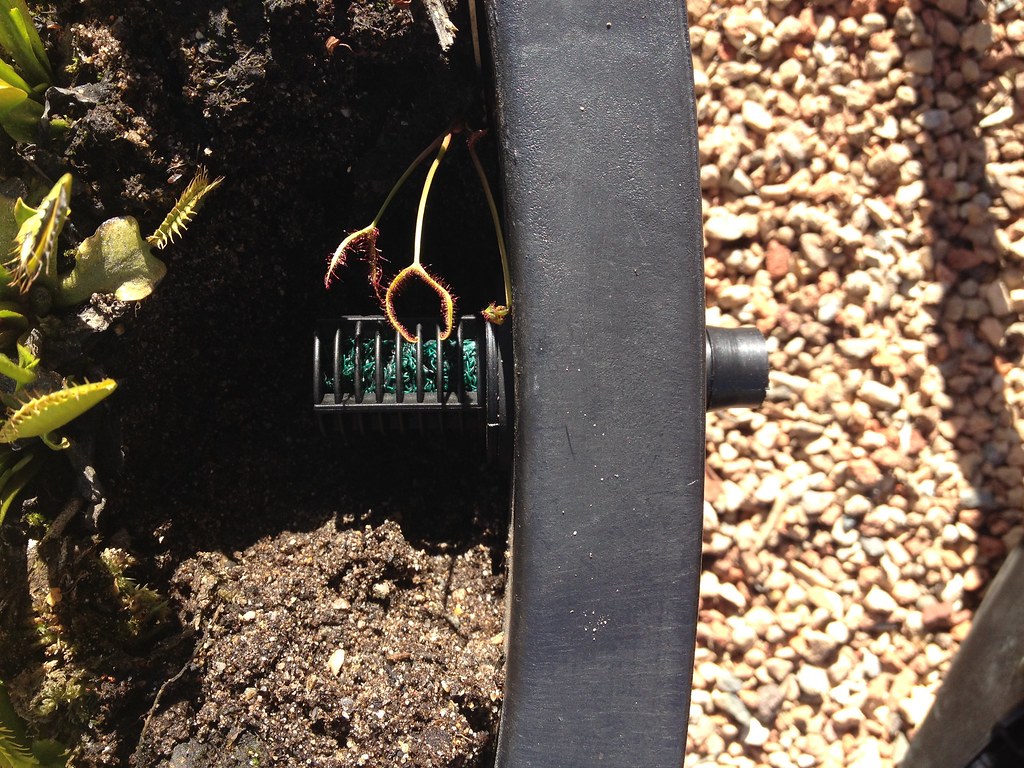
Substrate choice and design is important, and a lot more complex than you may think. A critical aspect of bog design is providing a reservoir of water that is accessible to the plants. The larger you make the reservoir, the more stable your bog will be, and the better your plants will grow. Make sure you allocate about half the volume of the pond as a reservoir. The volume and size of such a reservoir means it is very hard for the peat layer to dry out. I have found using a layer of gravel to be ideal for this purpose, with a perforated ag-pipe laid in the bottom so it forms a spiral to ensure even water distribution through this layer. The gravel also allows Sarracenia roots to grow through into the reservoir level, drought proofing your plants for as long as possible. I made the gravel layer about half the total height of the pond – 15 cm. This provides a reservoir of 140 Litres with 190 Litres of growing substrate on top. It will take a lot to dry this up entirely, giving you more than enough opportunity to correct any oversights. I also plan to insert a mesh basket of 200 mm (8”) diameter into the centre, allowing the peat moss to have continual contact with the reservoir.

As my ponds are 34 cm (just under 14”) deep, a 15 cm deep gavel layer leaves 20 cm for peat. Incidentally, 20 cm is about the right depth for Sarracenia roots; others have found through trial and error that anything taller is inefficient use of peat, especially in a tray system. Besides, the gravel will allow Sarracenia roots to penetrate if they do get much bigger.


As for the ag pipe, one end is oriented so it is vertical and is open to the surface, allowing water to be added via a hose. I sacrificed a plant label so that its stem pokes through the perforations at a height about 30-40 mm (nearly two inches) above the gravel, which is the ideal water level. As the label is white, it can be seen easily if you look down the tube and serves as a fill marker. If the label stem is exposed, water is needed.

When choosing the gravel, you need to use a proverbial acid test to make sure you get the right type. If you use something alkaline, such as crushed brick and concrete, or limestone, it will buffer or resist pH changes. In practical terms, an alkaline gravel will destroy the acidity of the substrate you use, potentially burning the roots of your Sarracenia as nutrients normally tied up by the acid is released. The acid test is simple – take a glass jar and some vinegar or another dilute acid to the landscaping yard. I used an acid-based tile cleaner, which smelled like acetic acid. Pour some into the glass jar (being careful not to get the acid on you – gloves are recommended) and drop in samples of each gravel. If bubbles fizz off the gravel, it is alkaline and unsuitable for use. I ended up getting blue metal gravel, which is crushed granite. It has worked well for me before.

So here is everything set up before the gravel went in. I used a trailer to get my gravel from the landscaping yard – $15 total. Before shovelling it into the bog, I washed it off thoroughly to get rid of as much contaminating dust as possible.

Here is the first few shovels of gravel going in to garden # 2. While seting up the first garden, I found it convenient to use the first shovel loads to secure the ag-pipe in the middle of the pond, and then used further shovel-loads to ensure the pipe is reasonably evenly distributed. I had the technique down pat for the second try.

And here the bog is with the gravel layer filled and smoothed. Note the ruler for depth and the ag pipe extending to the surface.

And that’s where the project finished on Sunday night. As the Stark family says, Winter is Coming (at least it is here in Australia), and as it is getting very cold in the evenings, I will have to down tools until next weekend. I will keep you posted on progress with as many photos as possible.

Sunday, April 27, 2014

Lithops

In addition to the Sarracenia, we love succulents! In particular, succulents that mimic rocks and stones – aka the Aiozaceae. Lithops, a genus of succulents from South Africa, are the epitome of biological mimicry because the mimic pebbles so perfectly. We have a small collection of them, most of which are unidentified except for a L. optica var. rubra that I was very kindly gifted by someone in the AUSCPS in Sydney (they are due a very fine Sarracenia flava in exchange very shortly!).

Other succulents we like are Haworthia, Faucaria (succulents that look like VFTs), Gasteria (crazy that they are Xanthorreaceae – the same family as grass trees in Australia) and Pleiospilos (although we don’t have any at the moment). I also tried Titanopsis calcaria once, but lost it due to ignorance of how to grow them. Maybe next time…

On the CP front –  major change in my CP growing strategy coming up tomorrow! Stay tuned…

Friday, April 18, 2014

Sarracenia t-shirts to support the NASC & Sarracenia forum!

The Sarracenia forum have launched a t-shirt campaign through Teespring to promote their excellent forum and raise money to support the North American Sarracenia Conservancy. Both are seriously great things to support, so get behind them if you haven’t already.

Here is the link to the online order form:

http://teespring.com/Sarracenia

They are around US$20 each, available in a few styles, and can be got the campaign ends in just over two weeks from today.

Thanks Melody (Hooray! Plants) for making me aware of this.

Changes to the collection coming with this year’s repotting!

Its been a while since I posted, so here is an update on what’s happening. Above is a shot of the collection a few months back. Note the area behind the plants…

Here is the same view now. Note the gravel and the pond shells replacing the bare earth? This is the new collection area, which will free up our paved entertaining area.

The intention is that the collection will be consolidated during this Winter’s repot and go into the ponds, which will serve as giant, potted bog gardens. The advantage of this method is that it is easy to maintain water levels, display the plants and provide the added bonus of habitat for frogs and dragonflies. I will be putting white cloud mountain minnows (Tanichthys albonubes) in to clean up any mosquitoes (and not eat the frogs!). Inspiration for this approach came from the Sarracenia forum’s master grower Meizzwang, whose collection shots can be seen on the forum here. He uses wading pools to house his plants, and they look amazing.

As for the reason for collection consolidation – well, you eventually reach a point where you realise you cannot have everything. The pond approach kind of enforces this. Between the two ponds, I can fit in 20 pots at either 250 or 300 mm each comfortably, including a 400 mm in the rear middle of each as a centrepiece. Smaller pots – well, yes they allow more plants, but the light penetration is not so great once they get growing, and the collection in smaller pots did not do so well as those in the big pots in our hot summer. The larger pots seemed to provide a more stable environment by the virtue of their size, and looked awesome to boot!

I plan to mass plant each pot with individual clones or comparable hybrids (maybe 4-8 rhizomes each), which should mean they will look amazing mid Summer. The spacing between pots will allow plenty of light in to everything for colour, trap humidity and keep a good microclimate going on, while allowing room for fish and other fauna to be happy. The idea is that the pots will also be below the rim of the pond so the Sphagnum can go nuts. I will also double pot so that the outer pot – whose bottom 50 mm will be full of pond gravel – will act as a place holder, so I can lift plants in and out without having to disturb everything.

I have way more than 24 clones of Sarracenia – see the grow list. So what is staying? My favourite clones of Sarracenia flava (can you say 400 mm pot mass planted with S. flava var. atropurpurea “FRT 1-1”?), a few hybrids, the leucophylla “Tarnok” and a few other species. I am sure what stays and what goes will be a moving feast for a while…

For a small number of clones, I will barely have enough to plant such large pots, while for most others I will have plenty of spares. So what will happen to the spares? I am throwing over between a bare-root, mail order dormancy sale (Australian eastern states only) or via the AUSCPS meetings later this year. Stay tuned for what happens, but if you are after something in particular (but not the FRT 1-1 or the Tarnoks – there are just enough for my needs at the moment!), drop me an email.

I do plan on keeping one of the current trays to allow me to do some Sarracenia from seed. I have a bunch of seedlings maturing now (maybe flowering this season for a few flava var. rugellii, and am anxious to see how they turn out. I also have seedlings from previous seasons coming up too. The seedling trays also allow me to keep weedy Drosera going in the collection, as they are dormant when I usually do repotting and often get inadvertently thrown out, no matter how careful you are. This is especially true of annuals like D. burmannii. I am also tempted to have a small side tray just for each of the D. binata clones I have – they look awesome in 200 mm pots!

So watch this space!

Tuesday, March 18, 2014

More butterflies on the Sarracenia

A while back, I posted about an unusual capture by one of my Sarracenia leucophylla 'Tarnok' plants - it caught a relatively large butterfly. Over the course of this summer, I kept an eye on what Lepidoptera were hanging around the pitcher plants. The same butterfly caught earlier, the common brown (Heteronympha merope), was a regular visitor, as was the grapevine moth (Phalaenoides glycinae). The latter was more frequently seen, but hard to approach.
 
However, I did manage to snap some shots of another male common brown nectaring on Gotcha! Plant's giant clone of Sarracenia flava var. rubricorpora:
 

Here is a closer shot, wings closed:
 
 
And another shot, wings open:
 
 
This male was not caught, probably because of my presence. As the traps will soon go down for winter, I will dissect a few to see what was caught. Until then, happy growing, and good luck for this year's season to everyone in the Northern Hemisphere!

Monday, January 27, 2014

Best. Season. EVER!!!!!!

 
I suppose most growers say that every year is the best year yet. Likewise, I say every year that this year's growth has been the best ever, and every time I tell the truth, probably because Sarracenia get better as they get older. Accordingly, this year's crop of pitchers is without doubt the best I have ever grown. The largest pitchers in the photo above are well over 60 cm tall, approaching 70 cm in one flava var. rubricorpora and my favourite S. flava, a var. atropurpurea called FRT 1-1.

One take away message I got from this season is that multiple divisions in big pots definitely are the way to go. The plants above are the ones I have learned this from. Last time I repotted, I put 4-8 divisions per 8"/20 cm pot because we were about to move house and I didn't have the time or space to do everything separately.

This strategy seems to work well because the clumps that are produced over time seem to create a microclimate that supports better pitchering. Take for example this S. flava var. cuprea "F1", a 35 year old clone originating from the collection of David Martin (the heat has bleached out the copper lids). This pot started out in 2012 with four divisions, and is now very bushy. Compared with smaller pots, it has no deformed primary pitchers, and is still producing half-pitchers, with phyllodes following. In contrast, the plants in smaller pots had a much higher rate of aborted or deformed pitchers during windy and/or hot weather, with only those plants in the middle or at the opposite end of the tray to the wind producing the best pitchers. In addition, the pH of larger pots is far more stable, meaning less repotting. If I wanted to, I could leave this plant go another year because a recent pH test showed the peat still has a pH of 4.5.

Here are some close ups of some of the better plants this season, in no particular order:

My all time favourite Sarracenia - S. flava var. atropurpurea "FRT 1-1".


This year, they got to 60+ cm, but they can get to 90+ cm! Maybe next year... Oh, and none of these photos are in any way 'shopped. The only correction I made was to tweak the contrast (not the colour balance!) to get rid of glare. FRT 1-1 really is this red! It is the best atropurpurea I have ever encountered.


This is a Sarracenia flava backcross of unknown parentage. It was a creation of David Martin, the owner of the now defunct Fly Free Zone. It reaches its peak mid summer. David was a master hybridiser. Note the pitcher at rear right was split open during hail late last year.

 
Sarracenia flava var. flava, reputed to be Slack's Maxima. It was imported specially from Germany in the early 1980s by noted Pinguicula grower Helmut Kibelis, who also produced the leucophylla clone Helmut's Delight. Whatever it is, this is one of the best flava var. flava here in Oz in terms of colour, although it can get a little floppy as the season wears on. It is a moderate divider.
Another flava var. flava, this clone is widely distributed in Australia - I have brought it as both var. flava and var. ornata of at least three people. IMHO, this is a good var. flava; its venation is not quite extensive enough to be an ornata. This plant can also get very tall; alas, it was in a smaller pot this year and, while producing nice pitchers, did not quite crack 40 cm. Next repotting, I will put all divisions of this clone into a 20 cm pot and watch what happens.
 
Sarracenia flava var. maxima, the all green variety, is uncommon in Australia - it was the last variety I managed to acquire. I grow four clones; three are Carolina seedlings from Ron Abernethy, and this clone that is again common regionally - Victoria to be precise - but not elsewhere. This is again another large plant, but again it was in too small a pot with too few divisions to reach its potential. Still, it cracked 50 cm this year, so not bad. I have only three or four divisions so far. Many var. maxima clones here are impostors, especially a clone circulating in many NSW collections that is actually a flava x alata cross.


A red tube - flava var. rubricorpora. This clone came from Steve Amoroso, who sells plants on Canterbury Road in Summer Hill, Sydney. It stands out because it holds its colour the best through even hot summers, but does not always get as red as this, especially after repotting. Another clone I grow, FRT-1, invariably gets very red, but looses its colour once it gets consistently hot daytime maximums. Maybe I need to cross these plants, although this clone has not flowered for me as yet. 
Sarracenia purpurea ssp. purpurea, complete with photobombing Utricularia. A seed grown clone from the collection of another local Sarracenia grower, it gets part solid red, part covered in thick red venation. This plant was only a few cms across last year, so I am looking forward to seeing how big it can get. Again, the best purpurea I have ever grown were in large pots that allowed them to spread out. 

 
Sarracenia 'Scarlett Belle'. John Creevey of Gotcha! Plants imported it as tissue cultures, and it is a best seller for him. David Martin once had a clone similar to this, but with much larger white windows. It was magnificent! Sadly, he seemed to have lost it some years ago, as I went through his collection looking for it. I foolishly left my plants in an in-ground bog garden when my parents moved house in the early 2000s, thinking I could easily get it again.
 
A Sarracenia x mitchelliana looking thing bred by David Martin, probably crossed to a leucophylla x rubra or even selfed. This is only a small plant, with pitchers not quite getting to 30 cm at flowering age. It pitchers non-stop once the season starts, and divides reasonably freely. I once had a similar plant to this whose white windows filled in pink-red within a few weeks of the pitcher opening! Again, I left it behind thinking I could get it again...


One plant I've sadly let go a bit is my Cephalotus. These plants are not in the best spot here, and they need frequent spraying with sulphur to clean up outbreaks of downy mildew. I've also let them dry out a bit too long between waterings, which hasn't helped. Still, they are pitchering nicely, albeit with very small traps - to give a sense of scale, the pygmy sundews around it are dormant D. palacaea, and the Nepenthes tendril is from a neighboring N. sanguinea.

The Sarracenia are pretty much done for this year now, or at least the species I grow, with only a few later summer pitchers and phyllodes yet to come. To close, I am planning a major collection re-vamp that will blend the Sarracenia into the garden and hopefully make them look more awesome than ever! I have just to finish some general landscaping before I can get started on it. Its repotting year too, so I am hoping to get some nice photo essays done to update the how-to pages. In the meantime, happy growing, and wishing those in North America and Europe a successful start to the 2014 season.